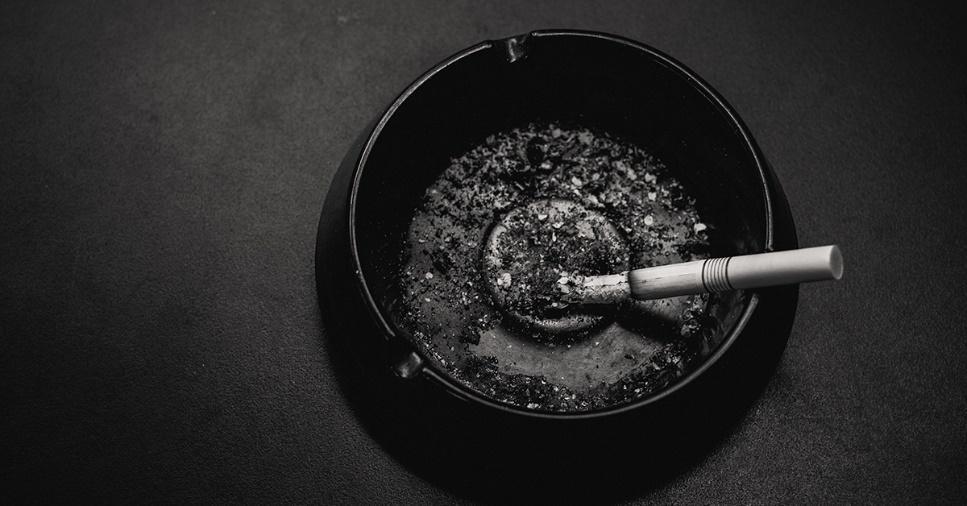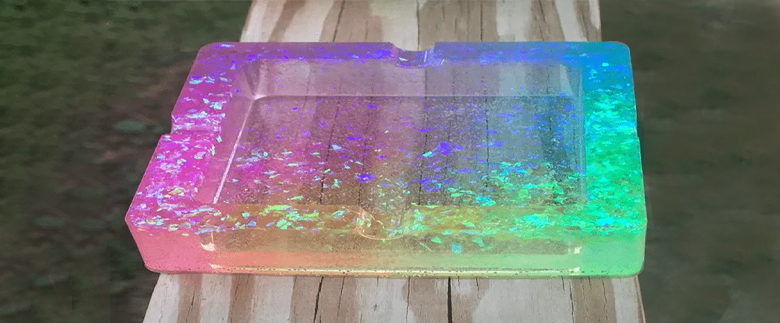
A resin ashtray is an essential tool in every smoking ritual. A resin ashtray is a great way to keep and dispose of off-rolling paper and cigarette filters and contribute to maintaining a clean environment. Resin Ashtray is a perfect project for beginners; it can be made of various materials, such as epoxy resin. Epoxy resin is a premium material that can be used for arrays of items, including ashtrays. If you want to start this project on how to make a glass ashtray, you have just landed in the right direction.
This blog post comprises some creative ideas on how to make an ashtray out of a glass bottle easily. If this is your first attempt, don't worry. We have got you covered! Keep reading!
Can resin ashtrays genuinely serve their purpose?
Use reasonable discretion while doing so. Only use appropriate tools and materials for the job so that you prevent your cigarette ashes from causing any chemical errors to the resin surface.
How to make an ashtray out of a glass bottle?
After a boozy weekend, it's time to reuse and organize some of the empty glass bottles which you have to turn into a fancy ashtray. The project will be challenging, but with the right approach, you will make it. Just perform each and every step in the series that we have outlined here.
Select your bottles

Select the shape and size of your bottle. You can use any bottle from whiskey bottles, wine bottles, and coke bottles. Remember, the bottle should be made of hard glass so that it can stand against the cutting and finishing process.
For this project, you will need-
- a tile saw.
- A Dremel tool.
- Measuring tape or a ruler.
- Safety glasses.
- Leather gloves.
- And of course, a bottle, which you probably have already selected
Step-1: Measure to mark the centre
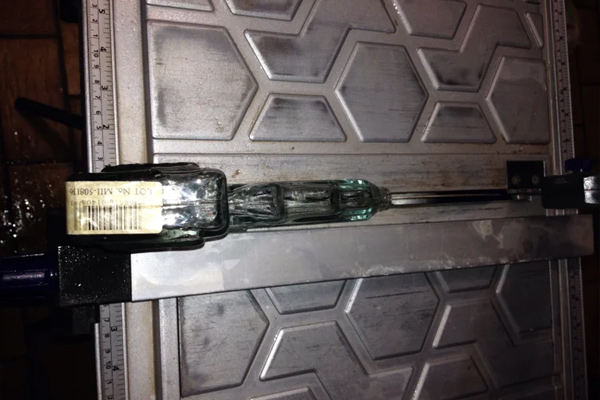
You can use any decorative bottle or wine bottle of your choice. You need to use a ruler or tape measure to determine the centerline of the bottle, aka ashtray. Some glass bottles already come with a distinct, marked line where two halves are joined, forming the bottle. Now that you have marked the centre, it's time to place the tile saw blade properly.
Step-2: Cutting
Before you get started with the cutting, make sure you wear safety measures, such as safety goggles, glasses, and gloves. Now cut the bottle gently and slowly, as cutting too fast can make the bottle prone to getting cracked and damaged if this is done correctly, congratulations! You are halfway through the project.
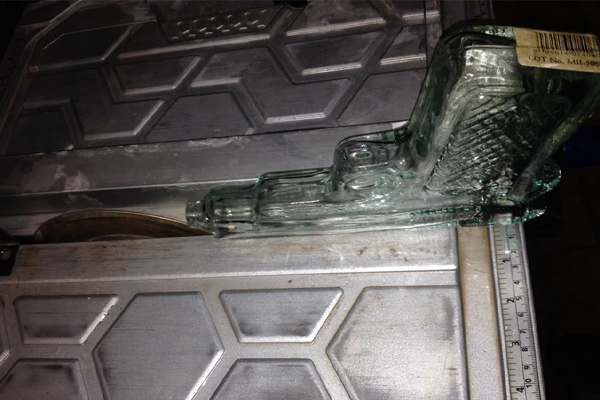
Step-3: Inspection
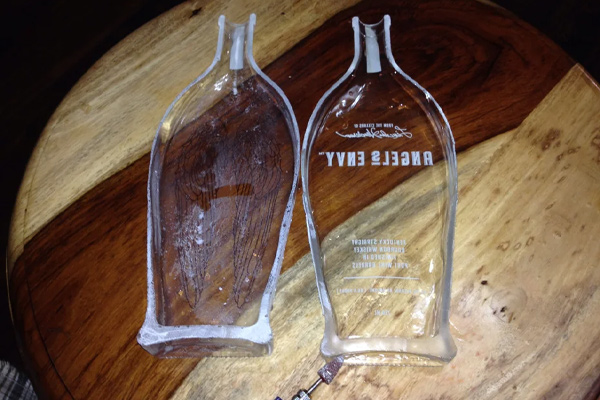
Now that you have cut the bottle into two halves scrutinize the bottle for any cracks which can get bigger and cause your bottle to break.
Step-4: Remove the sharp and rough edges
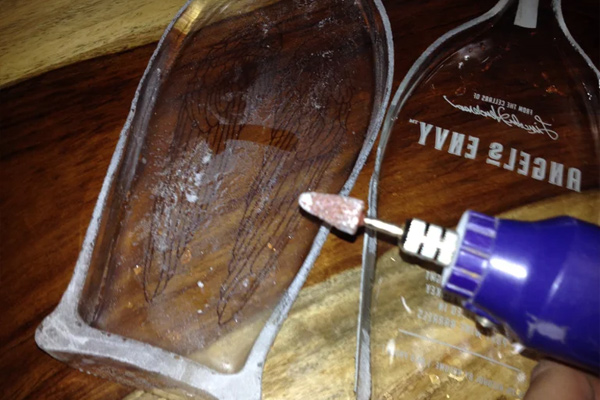
If you find the bottle clear with no cracks, it's time to smoothen the rough and sharp edges with the help of a Dremel tool with a stone attachment. Don't spend too much time here; you just have to remove all the sharp edges so it won't cause any cuts and bruises on your fingers. Also, pay special attention to the next of your bottle. This is where you will place your rolls or cigars. Any sharp edges can cut the leaf or filter of your precious rolls.
Step-5: Make the surface anti-roll
Rubber feet are a must if you're using wine bottles. To prevent the bottle from rolling, you need to attach the rubber feet to the bottom of the bottle. You can use whiskey bottles if you don't find rubber feet at your home.
Step-6: Get creative
Add some colours to the surface using a stick. But again, remember that you use appropriate chemicals to prevent your cigarette ashes from causing any chemical errors to the resin surface.
Phew! That was a long-bloody list that we compiled. Well, a pothead in need is a pothead indeed. Spread the word around, and stay tuned for more. Till then, wait safe and remember, a puff a day keeps the debauched attitude away!